Step 1: Prepare the GDS3710 for Connection
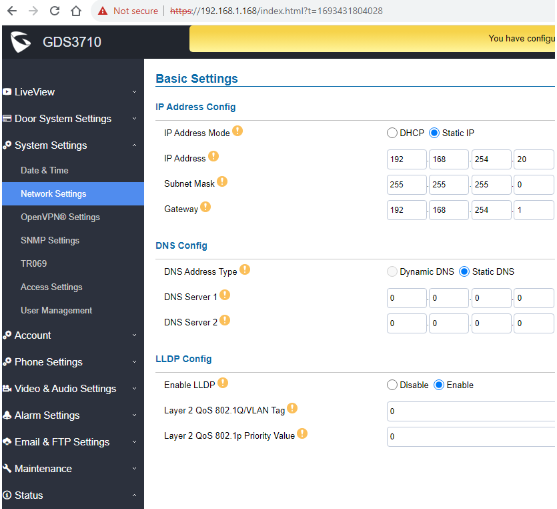
- Connect to the GDS3710 through a web browser using the default IP address, 192.168.1.168.
- Log in with the following credentials:
- Username: admin
- Password: The password should be printed on the device.
- Once inside the GDS3710’s graphical interface, navigate to the “System Settings” menu and select “Network Settings.”
- Assign a static IP address to the GDS3710 within the network segment provided by the NVR. This ensures that the camera and the NVR are on the same network. Save the configuration.

Step 2: Configure the NVR
- Access the NVR’s graphical interface. You can do this through the NVR’s IP address or by connecting a monitor to the NVR via the HDMI port.
- Navigate to the NVR’s settings menu, typically represented by a gear icon.
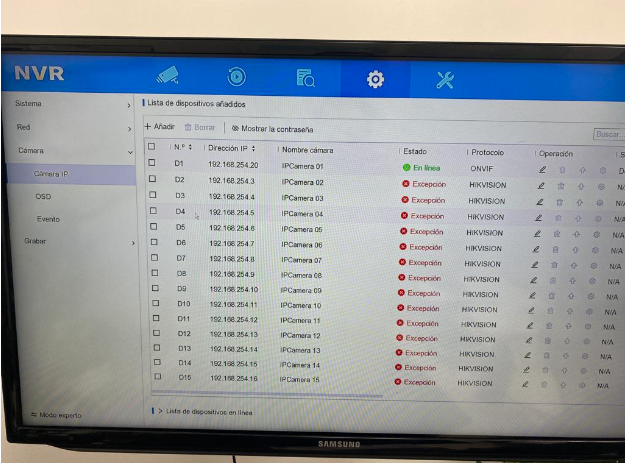
- Then, select “Camera IP” or a similar option in the NVR’s menu.
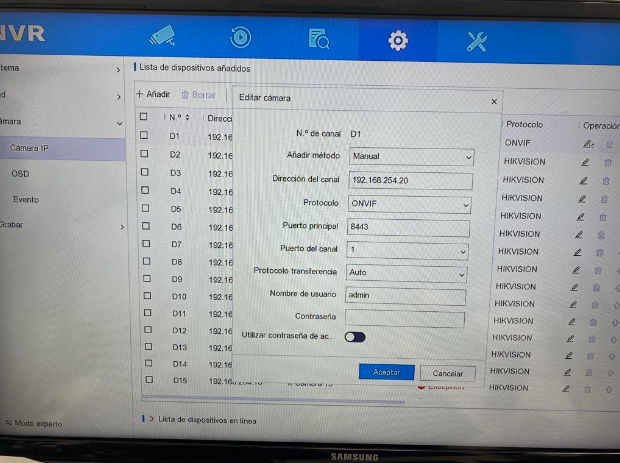
- Click the “Edit” button (usually resembling a pencil) on one of the available channels where you want to add the GDS3710 camera.
- Select the addition method as “Manual.”
- Enter the IP address you configured on the GDS3710 in the corresponding field.
- Choose the “ONVIF” protocol (ensure that the GDS3710 camera is ONVIF-compatible) and provide the password you set on the GDS3710.
- Save the configuration.

Step 3: Review the Result
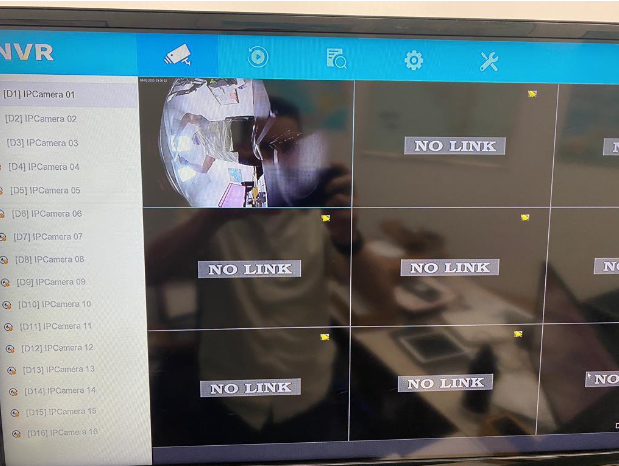
Once you have completed these steps, the GDS3710 should be registered on the NVR as an additional camera. You can verify this by accessing the live view on the NVR and selecting the channel where you added the GDS3710 camera. You should be able to view the camera’s video feed on the NVR.
Ensure that the IP address and password are correct, and both devices are on the same network for the configuration to work correctly.

